

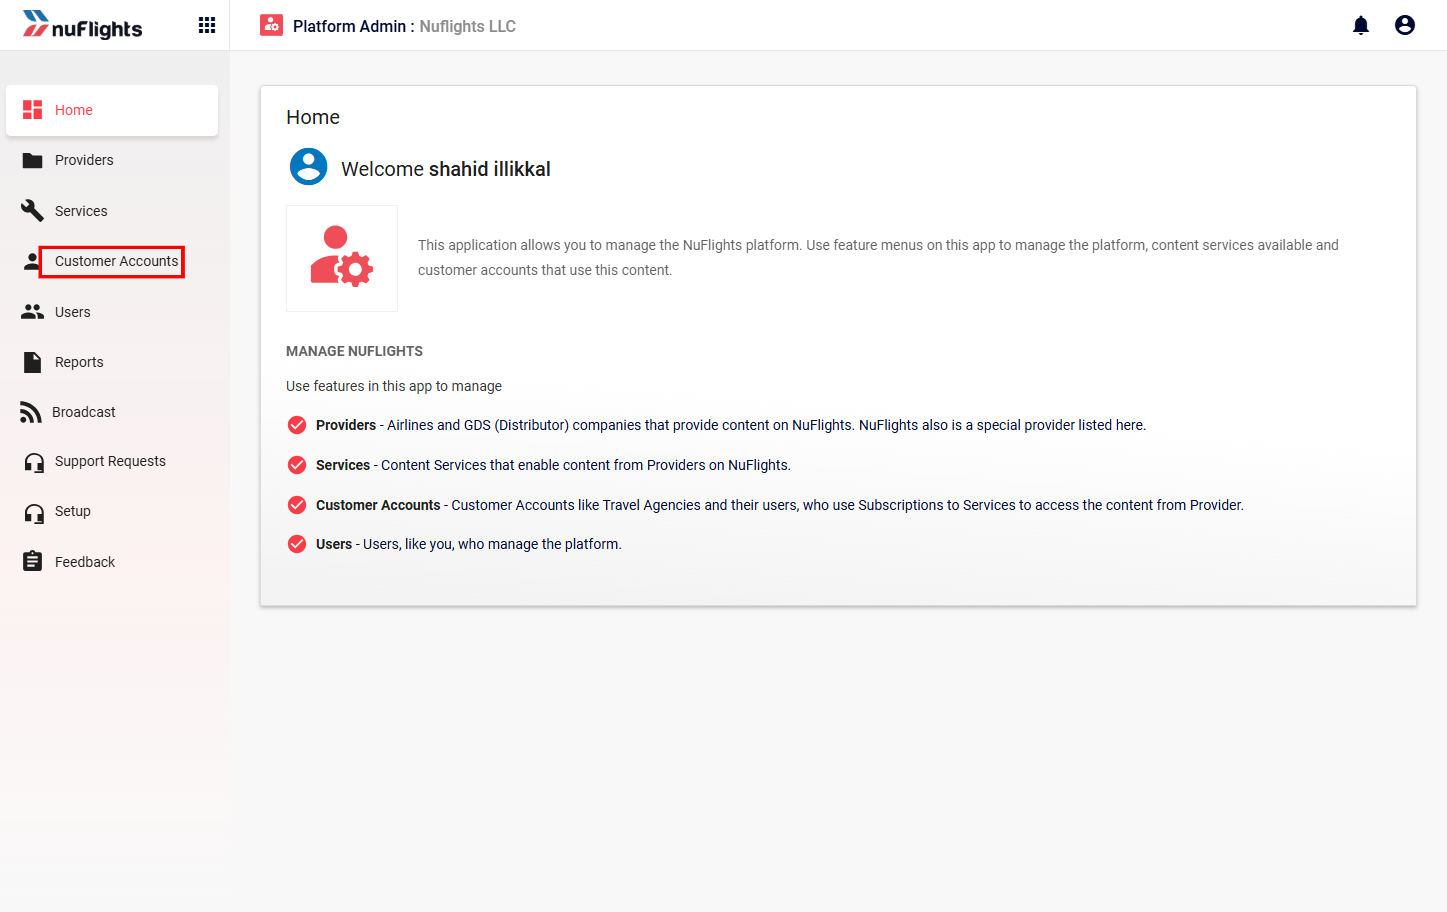
Inviting an Agency (Platform Admin)
The Platform Admin portal is maintained as a separate application, distinct from Agency Admin, Travel Workbench, and Local Inventory modules.
This portal is designed exclusively for internal NuFlights staff and administrators to manage agency onboarding, approvals, operational controls, and platform-level configurations.
Travel agencies and external users do not have access to the Platform Admin portal.
The Invite an Agency feature enables Platform Admins to securely onboard new organizations into the NuFlights ecosystem through an invitation-based registration process.
Instead of manually creating accounts, Platform Admins can send onboarding invitations directly to agencies, allowing them to self-register through a guided registration workflow. This approach improves onboarding efficiency, reduces manual effort, and ensures agency details are collected in a standardized format.
User Roles & Responsibilities
| Role | Responsibility |
|---|---|
| Platform Admin | Sends agency invitations, reviews registrations, approves/rejects agencies |
| Invited Agency | Completes registration and submits onboarding details |
| Account Manager | May be assigned after approval for operational onboarding |
Login to Platform Admin Portal
The Platform Admin logs into the dedicated NuFlights Platform Admin application using authorized credentials.
To access the agency invitation module:
Sending an Agency Invitation
The Sending an Agency Invitation process allows Platform Admins to securely initiate the onboarding of new agencies into the NuFlights platform. Through this flow, Platform Admins can send invitation emails directly to organizations, enabling them to complete a guided self-registration process. This invitation-based onboarding approach helps ensure controlled access, accurate agency data collection, and proper verification before an agency becomes active on the platform.
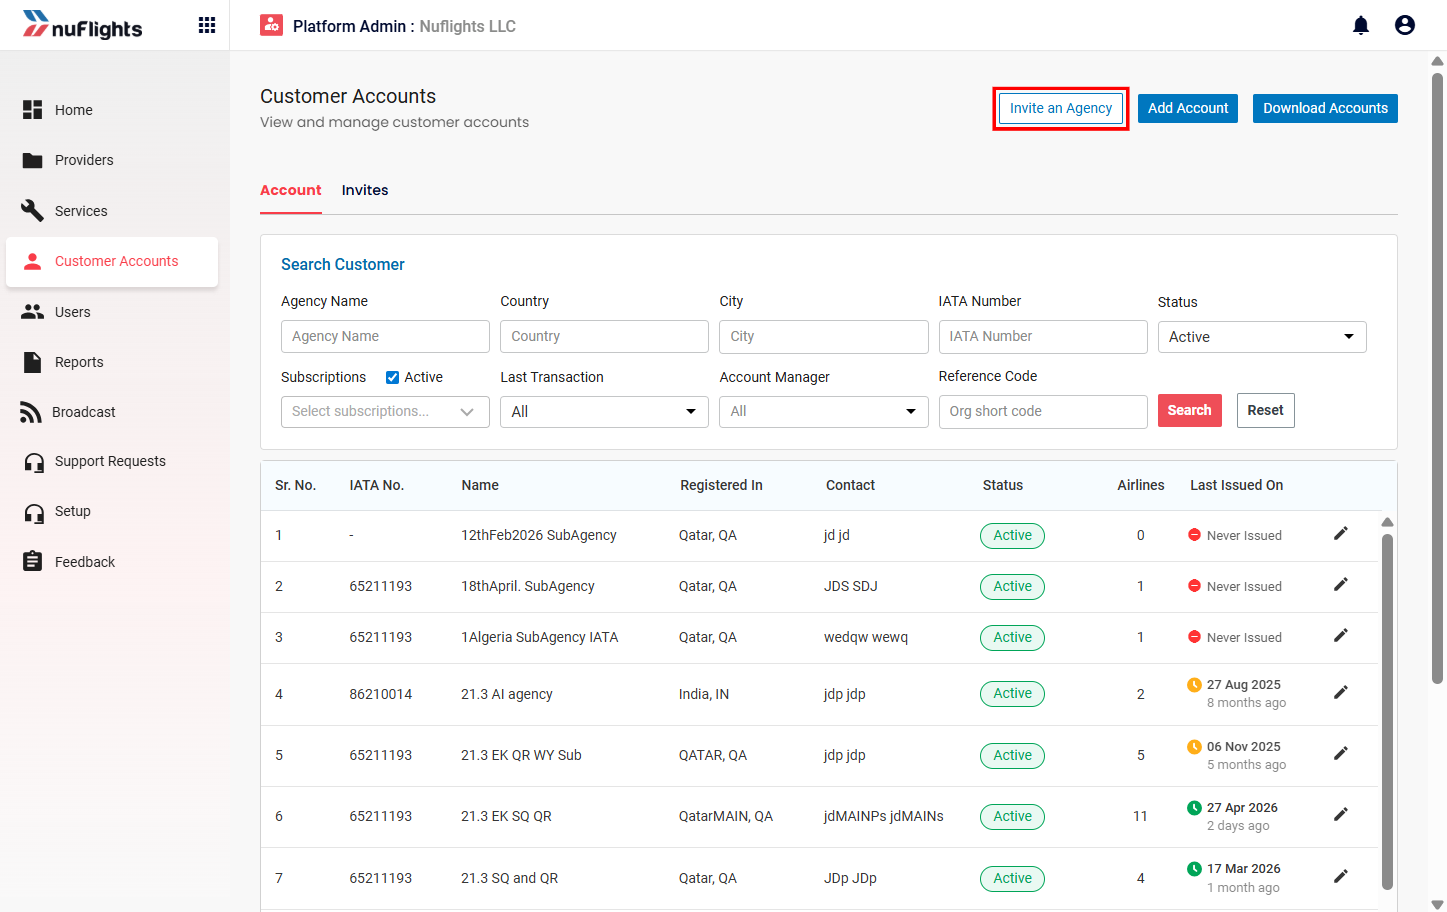
Step 1: Click “Invite an Agency”
Click the Invite an Agency button available within the Customer Accounts section.
This action opens the agency invitation pop-up form.
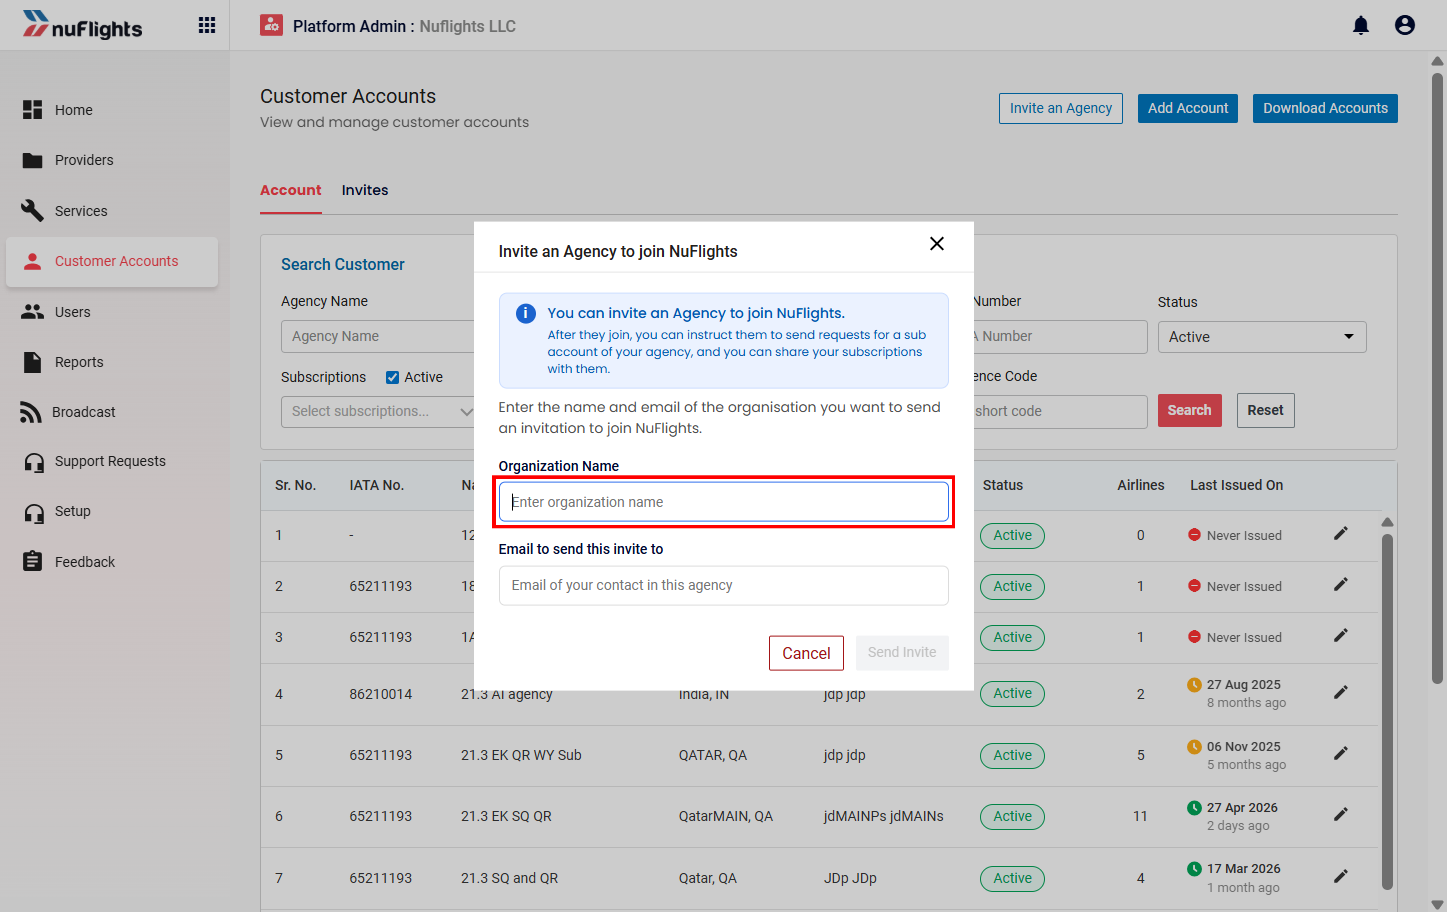
Invitation Form Details
The Platform Admin must provide the required agency details before sending the invitation.
Required Fields
| Field | Description |
|---|---|
| Organization Name | Official business/legal name of the invited organization |
| Agency Email ID | Primary contact email address used for onboarding communication |
Step 4: Send Invitation
After entering the required information:
- Click the Send Invite button.
- The system validates the data.
- A confirmation message is displayed after successful submission.
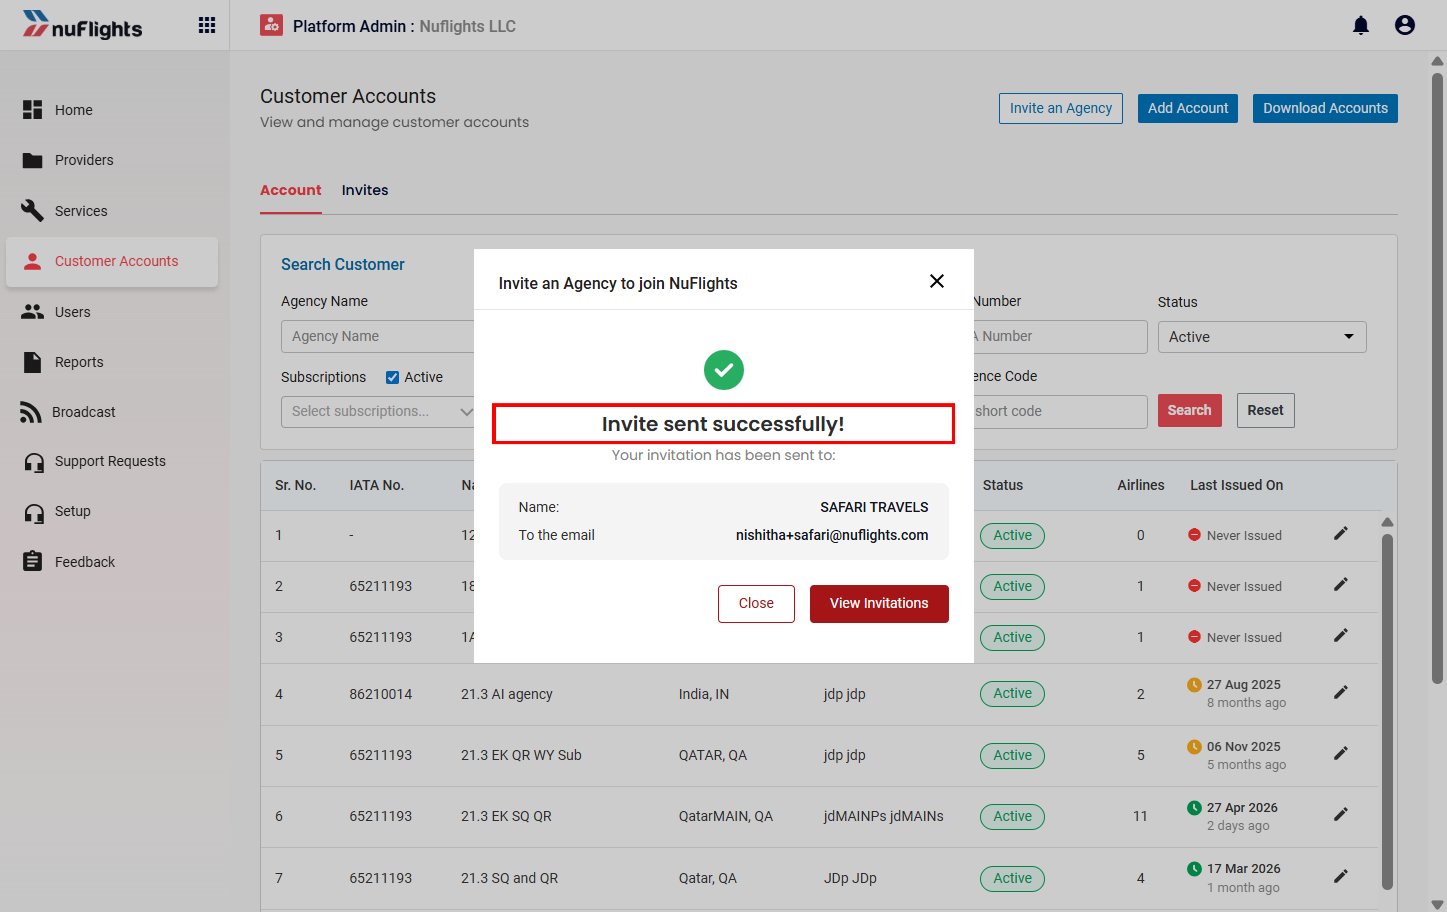
Once the invitation is sent:
- An automated onboarding email is triggered.
- The invited organization receives an email with registration instructions.
- The invitation status becomes visible in the Platform Admin portal.
At this stage, no actual agency account is created.
The invitation only grants access to the registration workflow. The agency account will be created only after successful registration submission and Platform Admin approval.
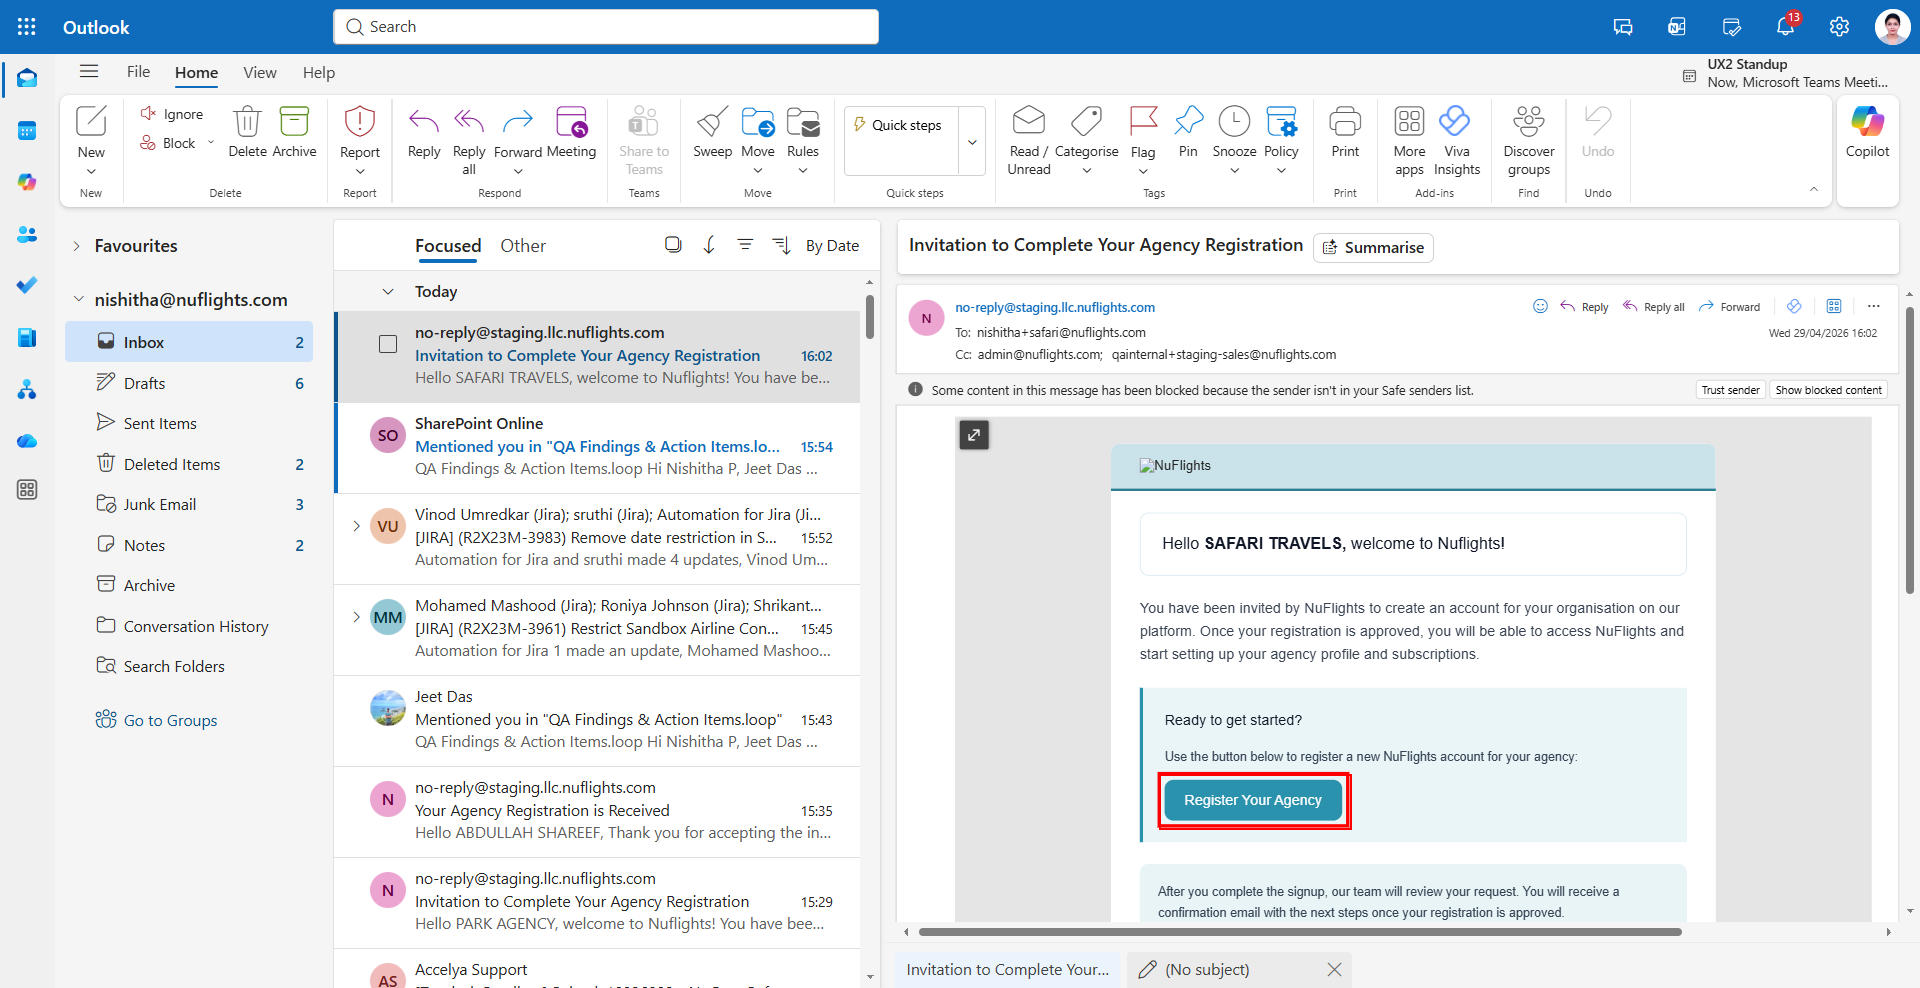
Invitation Email Flow
The invited organization receives an automated email notification from NuFlights.
The email typically includes:
- Invitation message
- Organization reference
- Registration instructions
- “Register your agency” button/link
- Secure onboarding access
The agency clicks the registration button to begin the onboarding process.
Agency Registration Workflow
After receiving the invitation email, the agency proceeds with the registration flow.
The registration process is designed as a guided multi-step onboarding workflow to capture all required operational, business, and compliance information.
Registration Overview
The agency registration process consists of:
- Agency Profile
- Agency Location
- IATA Registration
- Contact Information
- Review & Submission
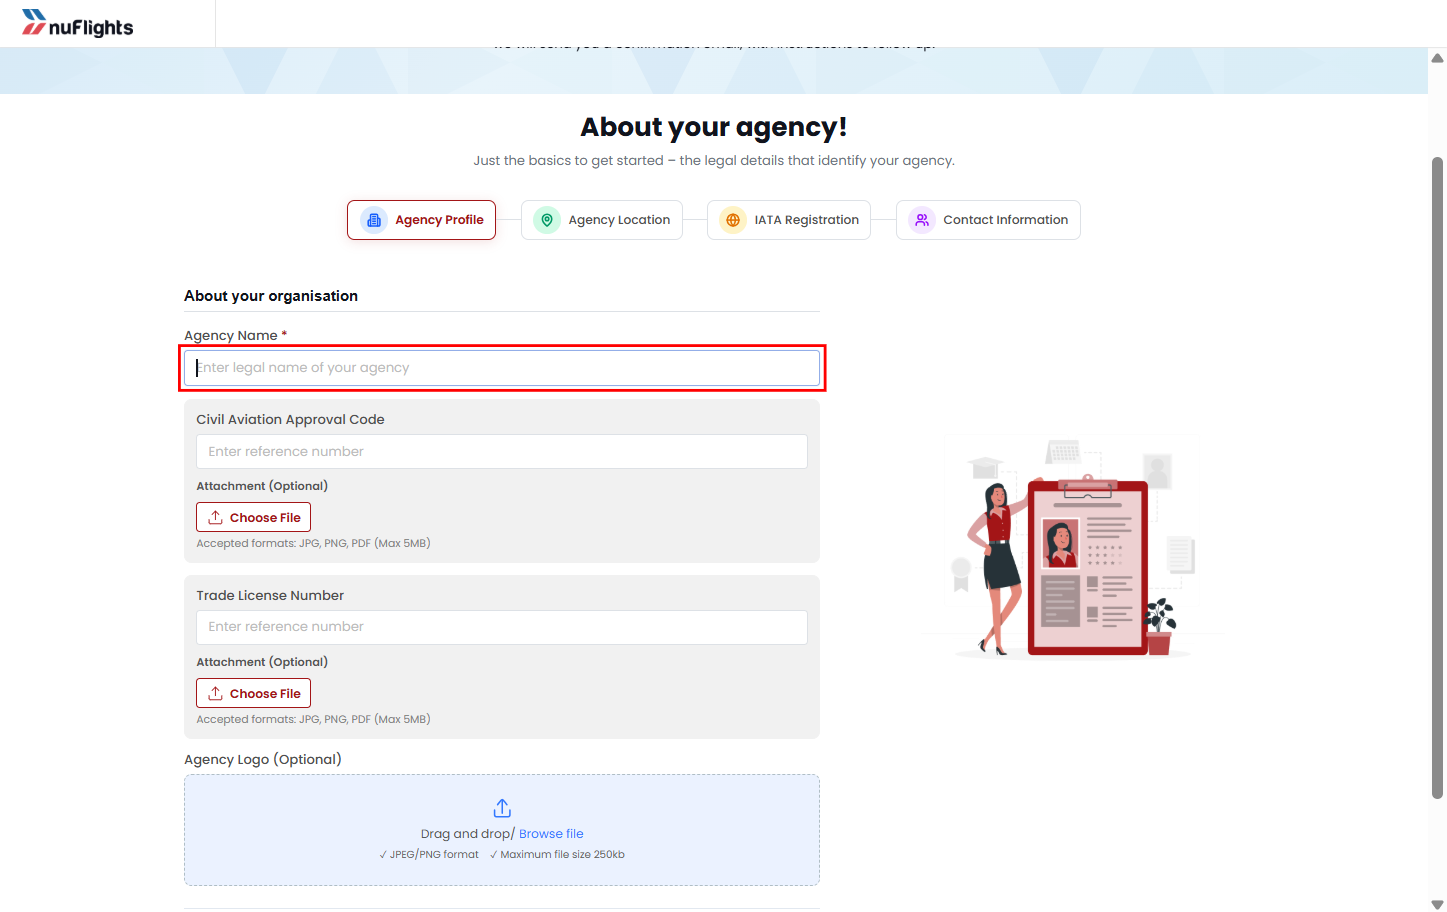
Step 1: Agency Profile
This section captures the agency’s core identity and verification details.
Captured Information
| Field | Description |
|---|---|
| Agency Name | Official registered agency/business name |
| Civil Aviation Code | Aviation authority registration details (if applicable) |
| Trade License Details | Business trade license information |
| Trade License Upload | Supporting document upload for verification |
| Agency Logo | Optional branding/logo upload |
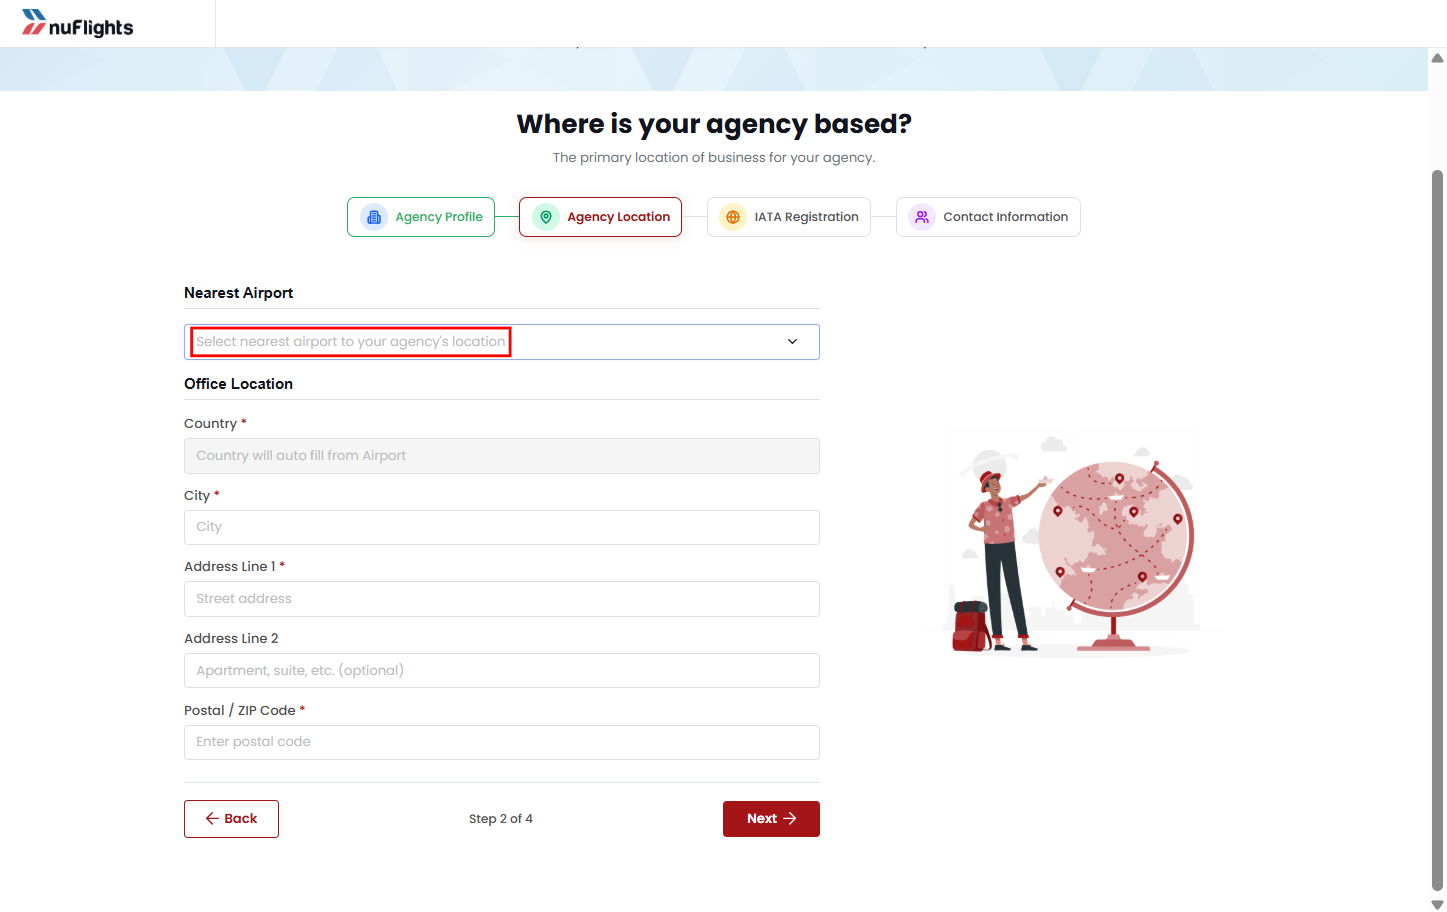
Step 2: Agency Location
This section captures the operational and geographical details of the agency.
Captured Information
| Field | Description |
|---|---|
| Nearest Airport | Airport closest to the agency location |
| Country | Agency operating country |
| City | City of operation |
| Office Address | Full business address |
| Postal Code | Postal/ZIP code |
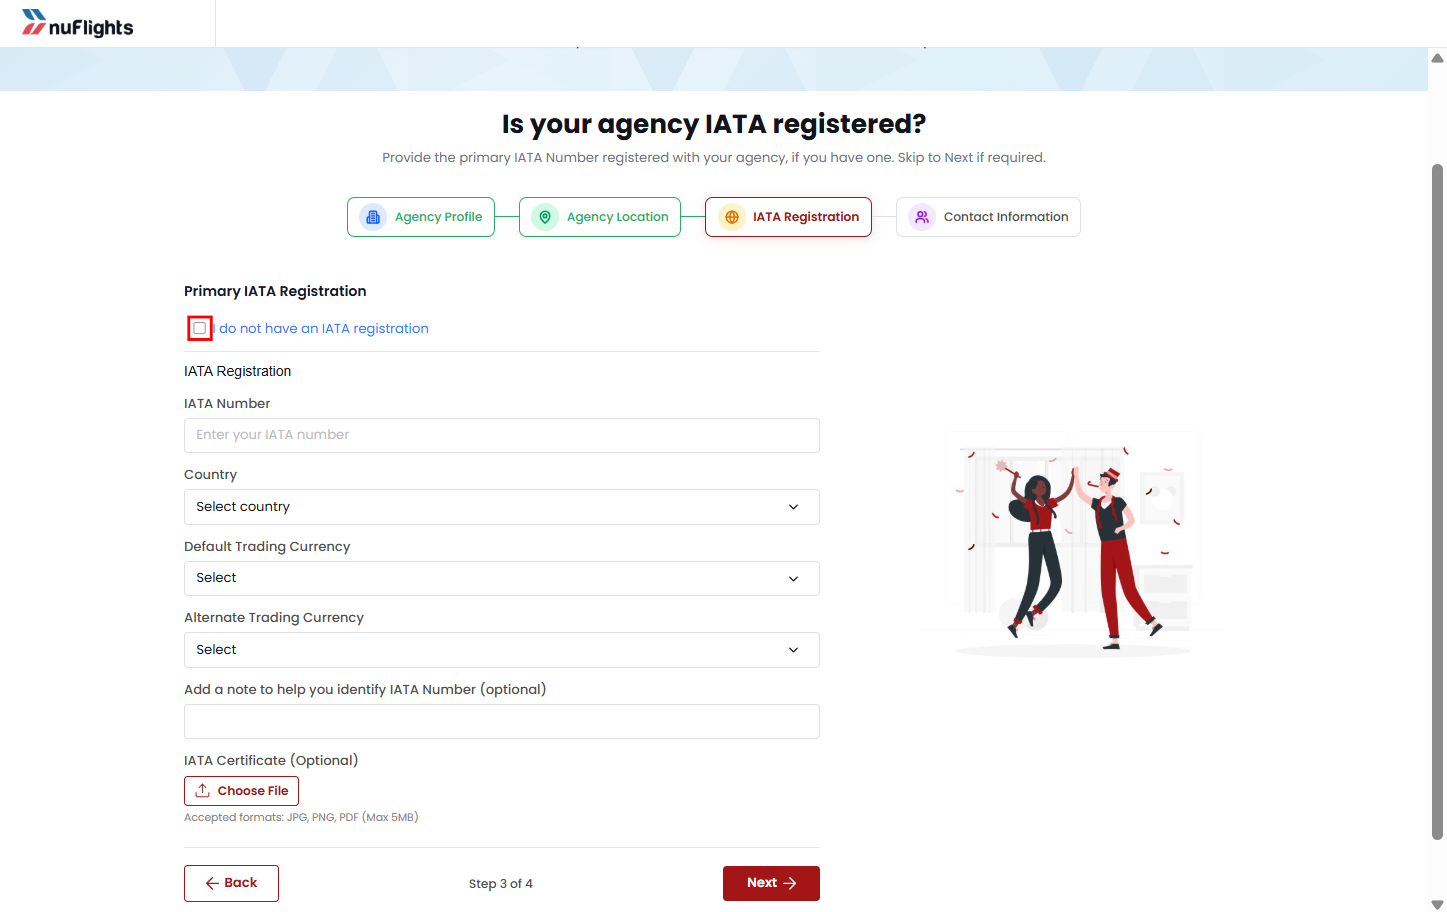
Step 3: IATA Registration
This step captures IATA accreditation information.
IATA Registered Agency
The agency can:
- Enter IATA number
- Provide supporting information if required
Non-IATA Agency
If the agency does not have IATA accreditation:
- They can select:
I don’t have an IATA number
This allows them to proceed without entering IATA details.
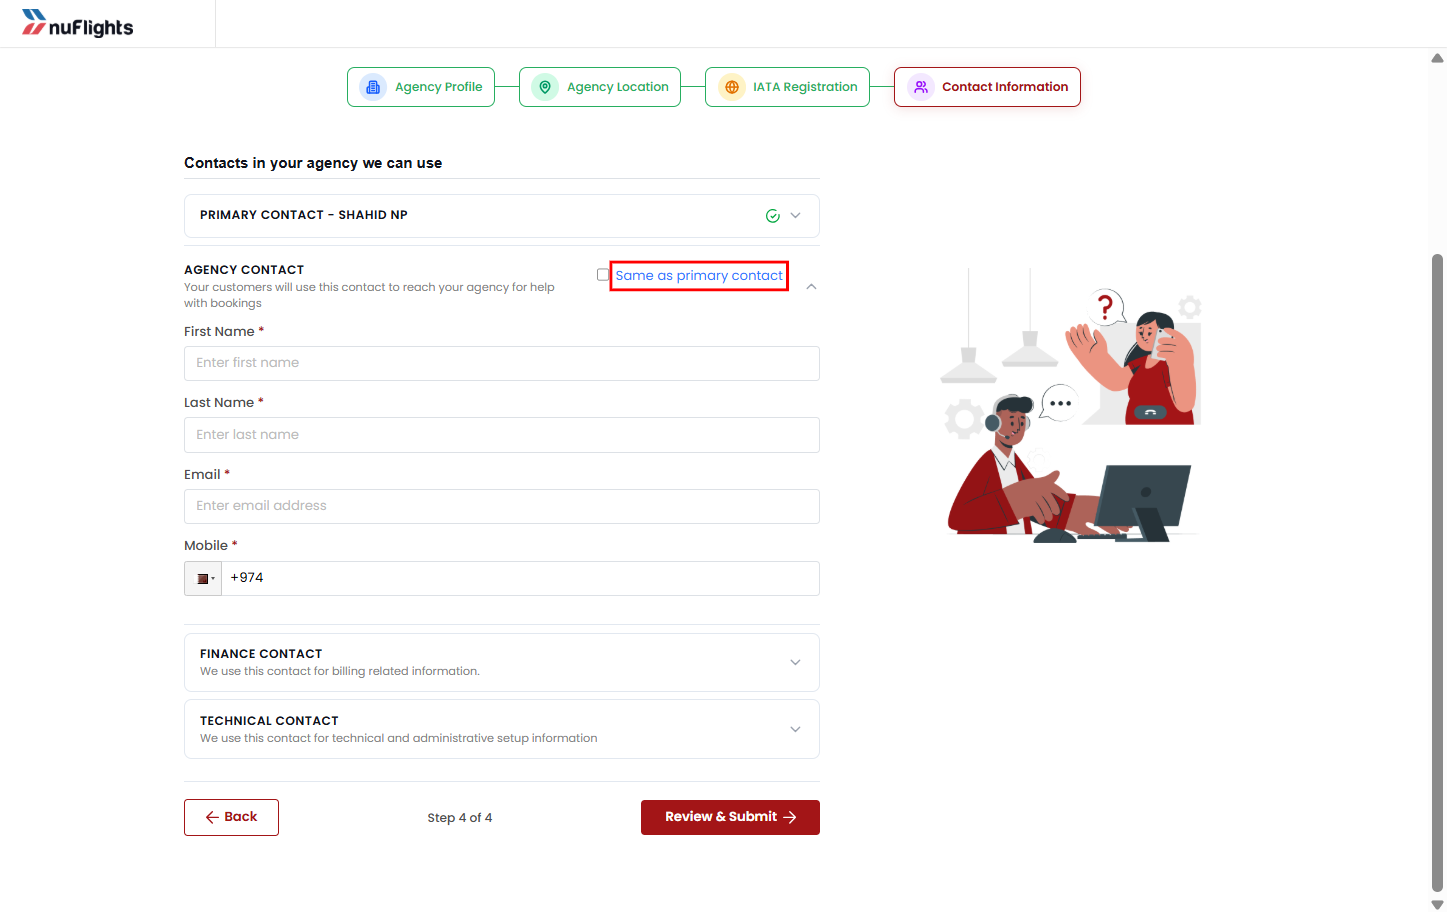
Step 4: Contact Information
This section captures the operational contact details required for onboarding and communication.
Contact Types
- Primary Contact
- Agency Contact
- Finance Contact
- Technical Contact
Auto-fill Feature
To reduce repetitive data entry:
The user can select:
Same as primary contact
When selected:
- Agency Contact/Finance Contact/Technical Contact fields are auto-populated using primary contact details.
Review & Final Submission
Before submission:
- The agency is redirected to a final review page.
- All entered information is displayed for confirmation.
- The agency can review and edit details if needed.
After verification:
- The agency clicks Submit.
- The registration request is created.
- The onboarding request is routed to the Platform Admin for review.
Registration Confirmation
After successful submission:
- A confirmation message is displayed.
- A unique Reference ID is generated for tracking purposes.
Example:
Your registration request has been submitted successfully.
Reference ID: NF-AG-10245
The agency is informed that:
- Their request is under review
- Approval may take 1–2 business days
Platform Admin Review Workflow
Once registration is submitted, the onboarding request appears in the Platform Admin review queue.
Customer Accounts → Invite Section
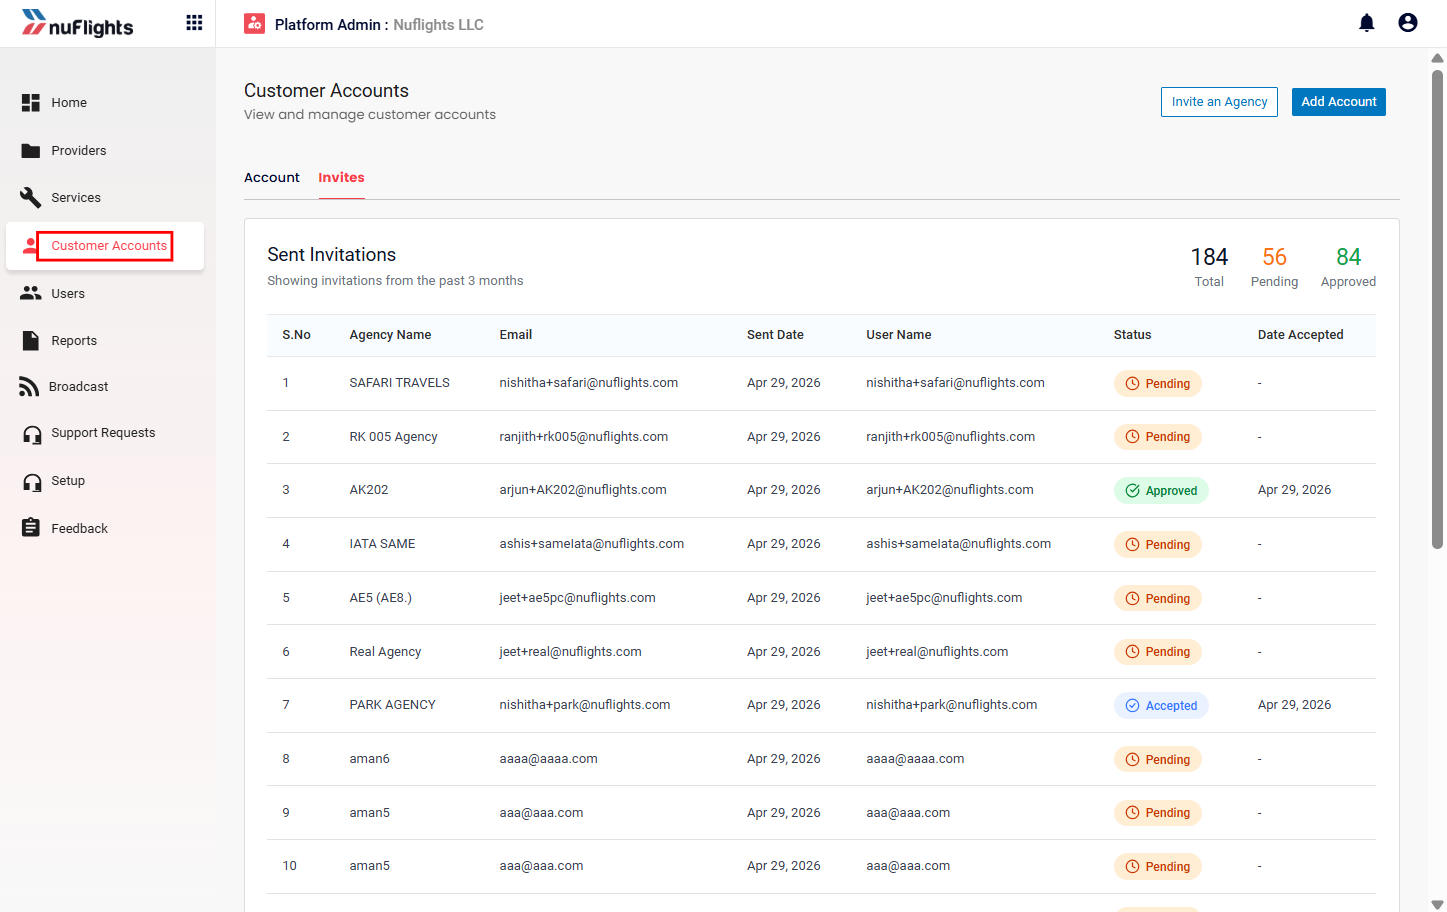
Reviewing Submitted Requests
The Platform Admin can:
- View all submitted agency requests
- Track onboarding statuses
- Review uploaded documents
Approval & Rejection Actions
After review, the Platform Admin updates the request status.
Approve Agency
If the registration is valid:
- Click Approve
- Assign an Account Manager (if applicable)
- Finalize onboarding
Reject Agency
If the registration fails validation:
- Click Reject
- Enter mandatory rejection reason
- Submit rejection decision
Status Lifecycle
| Status | Meaning |
|---|---|
| Pending | Invitation sent successfully |
| Accepted | Registration submitted and awaiting review |
| Approved | Agency approved |
| Rejected | Registration rejected |